Hey there! As a supplier of polypropylene pipes, I've seen firsthand how these pipes can revolutionize a school plumbing system. They're durable, cost - effective, and easy to install. In this blog, I'll walk you through the process of installing polypropylene pipes in a school plumbing system.
Why Choose Polypropylene Pipes for Schools?
Before we dive into the installation process, let's quickly talk about why polypropylene pipes are a great choice for schools. First off, they're incredibly durable. Polypropylene can withstand a wide range of temperatures and pressures, which is crucial in a school environment where there's a high demand for water.
Secondly, they're resistant to corrosion. Unlike metal pipes, polypropylene pipes won't rust or corrode over time, which means less maintenance and longer - lasting plumbing. And let's not forget about cost. Polypropylene pipes are generally more affordable than other types of pipes, making them a budget - friendly option for schools.
Tools and Materials You'll Need
To install polypropylene pipes in a school plumbing system, you'll need the right tools and materials. Here's a list:
- Pipe cutter: This is used to cut the polypropylene pipes to the right length.
- Welding machine: Polypropylene pipes are joined using a welding process, so you'll need a good quality welding machine.
- Measuring tape: To measure the length of the pipes accurately.
- Pipe supports: These are used to hold the pipes in place and prevent sagging.
- Safety equipment: Gloves, safety glasses, and a dust mask are essential to protect yourself during the installation process.
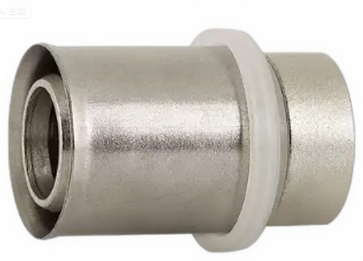
And of course, you'll need the polypropylene pipes themselves. We offer a variety of polypropylene pipes, such as PPR Pipe With Aluminum, Ppr Pipe For Water Supply, and PPR Plastic Pipes. These pipes are designed to meet the specific needs of different plumbing systems.
Step - by - Step Installation Process
1. Planning
The first step in any plumbing installation is planning. You need to have a clear idea of where the pipes will run, how many joints there will be, and where the fixtures will be located. Start by creating a detailed layout of the school's plumbing system. Consider factors like the location of water sources, the number of classrooms and bathrooms, and any special requirements such as wheelchair - accessible facilities.
2. Measuring and Cutting
Once you have a plan, it's time to measure and cut the pipes. Use a measuring tape to determine the length of each pipe section. Mark the pipes with a pencil or a marker, and then use a pipe cutter to make clean, straight cuts. Make sure to measure twice and cut once to avoid any mistakes.
3. Welding the Pipes
Polypropylene pipes are joined using a welding process. First, heat the welding machine to the recommended temperature. The temperature usually ranges between 260 - 280 degrees Celsius. Then, insert the pipe and the fitting into the appropriate welding nozzles on the machine. Hold them there for a few seconds until the plastic becomes soft.
Quickly remove the pipe and fitting from the welding machine and join them together. Apply gentle pressure and hold them in place for a few seconds until the weld sets. Make sure the pipes are aligned properly during the welding process to ensure a strong and leak - free joint.
4. Installing Pipe Supports
After welding the pipes, it's important to install pipe supports. These supports prevent the pipes from sagging or moving, which can cause stress on the joints and lead to leaks. Place the pipe supports at regular intervals along the length of the pipes. The spacing between the supports depends on the diameter of the pipes and the local building codes.
5. Connecting to Fixtures
Once the main pipe network is installed, it's time to connect the pipes to the fixtures such as sinks, toilets, and showers. Use the appropriate fittings to make these connections. Make sure to follow the manufacturer's instructions for each fixture to ensure a proper and leak - free connection.
6. Testing the System
After the installation is complete, it's crucial to test the plumbing system. Turn on the water supply and check for any leaks at the joints and fixtures. If you find any leaks, mark the location and repair them immediately. You may also want to check the water pressure to make sure it's within the acceptable range.
Tips for a Successful Installation
- Follow the manufacturer's instructions: Each type of polypropylene pipe and welding machine may have specific instructions. Make sure to read and follow them carefully to ensure a proper installation.
- Work in a well - ventilated area: The welding process can produce fumes, so it's important to work in a well - ventilated area to avoid inhaling these fumes.
- Take your time: Rushing through the installation can lead to mistakes. Take the time to measure, cut, and weld the pipes properly.
Conclusion
Installing polypropylene pipes in a school plumbing system is a great way to ensure a durable, cost - effective, and low - maintenance plumbing solution. By following the steps outlined in this blog and using the right tools and materials, you can successfully install a polypropylene pipe system in a school.
If you're interested in purchasing polypropylene pipes for your school's plumbing project, we'd love to hear from you. Contact us to discuss your requirements and get a quote. We're here to help you make the best choice for your plumbing needs.


References
- "Plumbing Installation Handbook"
- Manufacturer's manuals for polypropylene pipes and welding machines